

Introduction
Our homes are more than just buildings; they are a reflection of our values, lifestyles, and aspirations. With the growing awareness about the importance of sustainability, many homeowners are seeking ways to incorporate eco-friendly practices into their living spaces. Not only does sustainable living benefit the environment, but it also encourages a healthier lifestyle and can even lead to financial savings in the long run. This introductory section delves into the essence of sustainable living, the value of DIY sustainability projects, and provides a sneak peek into some of the hands-on projects we’ll be exploring.
Importance of sustainable living
Sustainable living goes beyond just being a trend. It’s about making choices that consider the well-being of the planet, its resources, and future generations. With pressing environmental challenges like climate change, deforestation, and pollution affecting our daily lives, it’s evident that individual actions matter. Adopting a sustainable lifestyle:
-
Reduces our carbon footprint, lessening our impact on the environment.
-
Promotes healthier living, as many sustainable choices also align with healthier habits.
-
Supports local economies, especially when we prioritize buying local and organic products.
A Personal Touch
Beyond the broader implications, sustainable living also brings about a sense of personal fulfillment. Knowing that our actions, however small, contribute to a greater good can instill a sense of purpose and satisfaction.
Explanation of DIY sustainability projects
DIY, or “Do It Yourself”, projects provide an opportunity for individuals to take proactive steps in customizing their homes while incorporating sustainable principles. DIY sustainability projects:
-
Allow homeowners to use recycled or upcycled materials, reducing waste and the demand for new resources.
-
Often prove more cost-effective than store-bought alternatives, leading to financial savings.
-
Offer a hands-on approach, giving individuals the satisfaction of creating something useful and eco-friendly from scratch.
Crafting with Purpose
The beauty of DIY projects lies in the process as much as in the end result. The act of creating, especially with sustainability in mind, nurtures a deeper connection to our environment and the items we craft.
Overview of the projects to be covered
As we journey through this guide, we’ll explore a range of DIY projects tailored for different areas of your home. From crafting eco-friendly furniture pieces to creating organic cleaning solutions, there’s something for everyone, irrespective of expertise level. Some of the exciting projects we’ll delve into include:
-
Upcycled furniture transformations.
-
Homemade composting systems.
-
DIY natural cleaning products.
Embarking on a Green Adventure
Whether you’re a seasoned DIY enthusiast or a beginner eager to dip your toes into the world of sustainable crafting, this guide promises to offer insights, tips, and projects that cater to varied interests and skill sets.
In conclusion, as we embark on this green adventure together, remember that each sustainable choice and DIY project contributes to a larger global movement toward eco-conscious living. Ready your tools, gather your materials, and let’s set forth on this exciting journey of crafting a sustainable home.
DIY Solar Panels
Harnessing the power of the sun has never been more accessible. With advancements in technology and an increase in available resources, building your own solar panels is now a viable option for many homeowners looking to reduce their carbon footprint and electricity bills. In this section, we’ll demystify the concept of DIY solar panels, delve into their benefits, and guide you through the steps to implement this sustainable energy source in your own home.
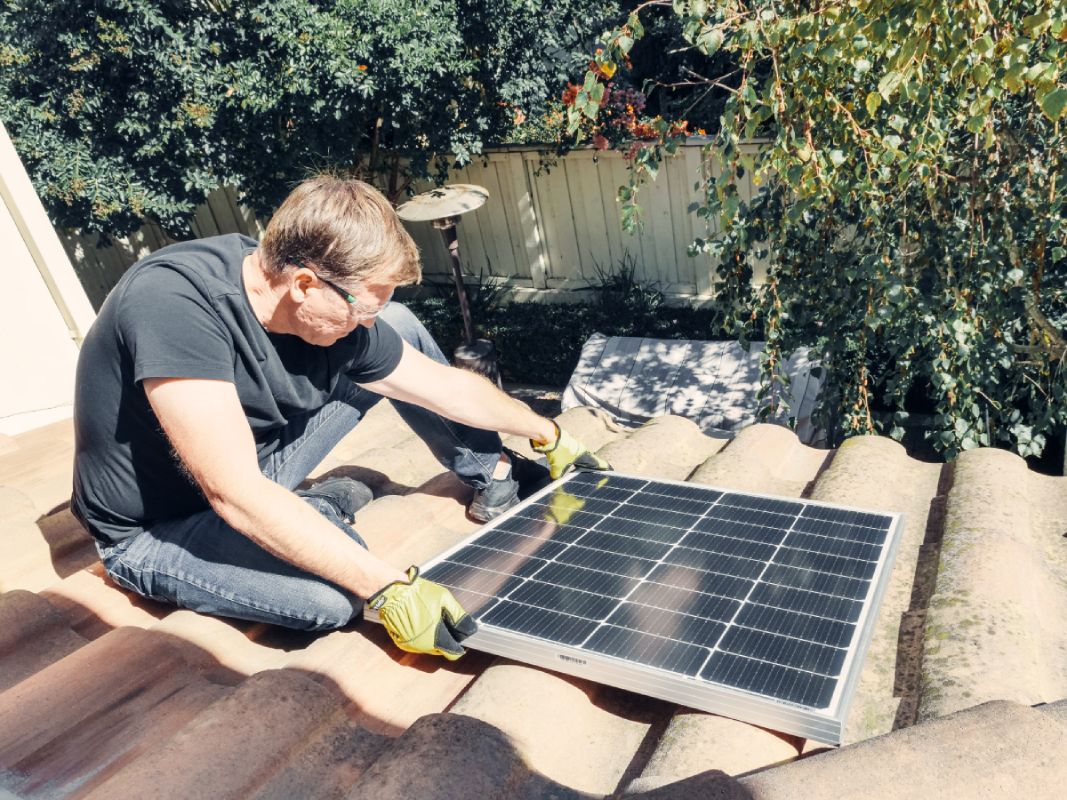
Introduction to DIY solar panels
Solar panels, at their core, are devices designed to convert sunlight into electricity. While commercial solar panels are widely available, the DIY approach allows for customization, cost-saving, and the joy of creating a functional system from scratch. Though the term “DIY” might suggest simplicity, building solar panels does require some research, preparation, and a basic understanding of electrical systems.
A Closer Look
Solar panels consist of photovoltaic (PV) cells that capture sunlight and convert it into direct current (DC) electricity. An inverter then transforms this DC into alternating current (AC), which powers our homes.
Explanation of benefits
There’s more to DIY solar panels than just the allure of a hands-on project. Here’s why they’re gaining traction:
-
Cost-Efficiency: Creating your solar panels, especially if you source materials wisely, can be more affordable than purchasing commercial systems.
-
Environmental Impact: Using solar energy reduces reliance on fossil fuels, curbing greenhouse gas emissions and promoting cleaner air.
-
Energy Independence: With solar panels, you’re less dependent on the grid, allowing for potential savings on electricity bills and increased resilience during power outages.
-
Customization: DIY allows you to design a system that best fits your home’s energy needs and spatial constraints.
Boosting Home Value
Additionally, homes equipped with solar energy systems often see a boost in their market value, making this a worthwhile long-term investment.
Steps for implementing at home
While the process of building and installing solar panels can be intricate, breaking it down into manageable steps can simplify the journey:
-
Research and Planning: Before diving in, research your local regulations and guidelines regarding solar installations. Some areas may offer tax incentives or rebates.
-
Source Materials: Purchase high-quality PV cells, an inverter, and other necessary materials. Opt for suppliers known for sustainability and quality.
-
Crafting the Panel: Arrange the PV cells in a series on a flat, sturdy surface, ensuring they’re secure. Connect them using tabbing wire, ensuring the flow of electricity is consistent.
-
Build a Protective Frame: Create a frame using sustainable materials like reclaimed wood or metal to house the panel, protecting it from environmental factors.
-
Install and Connect: Position your panel in a location with maximum sun exposure, preferably a south-facing roof. Connect the panel to an inverter, and then to your home’s electrical system.
-
Monitor and Maintain: Regularly inspect your panels for debris or damage and ensure connections remain intact.
Safety First
Always remember to prioritize safety. Wear protective gear during the installation process and consider consulting with a professional, especially when connecting the system to your home’s electrical grid.
In wrapping up, DIY solar panels offer a fulfilling and impactful way to introduce sustainable energy into your home. By understanding their benefits and following the steps with precision, you can proudly power your home with the sun, fostering both environmental and personal well-being.
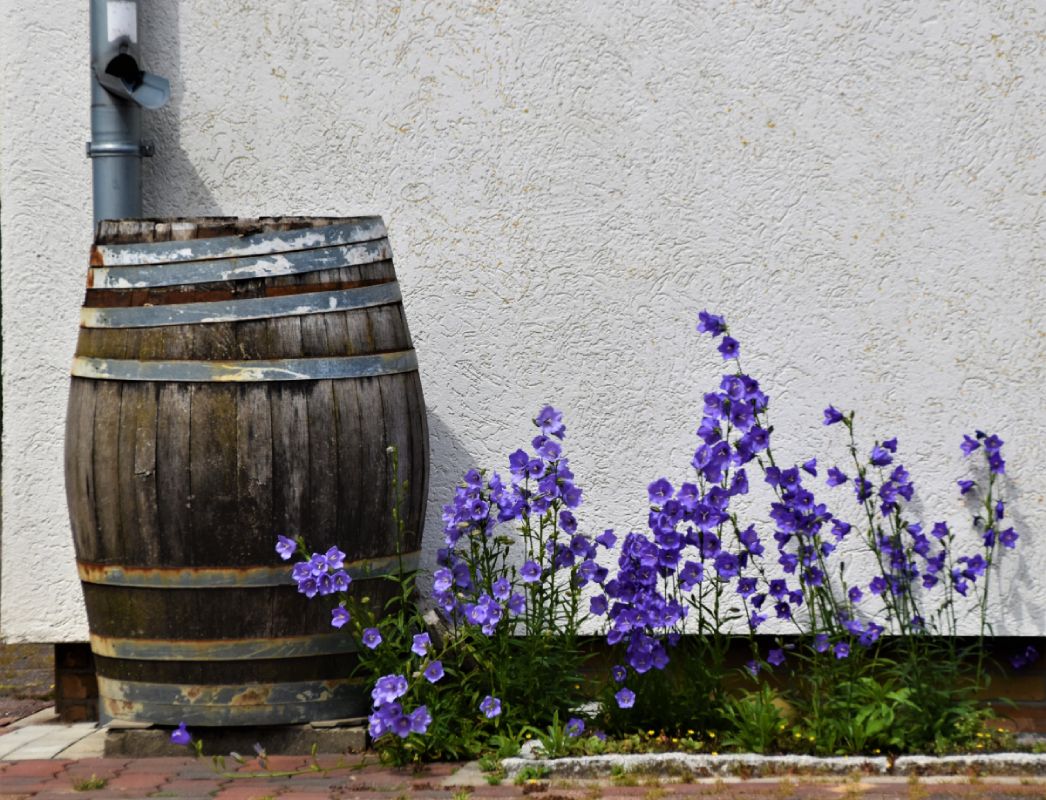
Rainwater Harvesting System
In an era where water conservation is of utmost importance, rainwater harvesting emerges as a practical and sustainable solution. By collecting and storing rainwater, homeowners can reduce their dependency on municipal water supplies, minimize the strain on local water resources, and play a role in combating water scarcity. This section introduces the concept of rainwater harvesting, provides an overview of setting up a DIY collection system, and guides you through the steps of crafting your very own system.
Importance of rainwater harvesting
Rainwater harvesting is not just about water conservation; it’s a step towards a sustainable future. Here’s why:
-
Water Conservation: With increasing water scarcity globally, every drop saved contributes to a more sustainable water future.
-
Reduces Water Bills: Utilizing harvested rainwater for non-potable purposes, such as gardening or toilet flushing, can significantly reduce household water bills.
-
Lessens Groundwater Depletion: Relying on harvested rainwater decreases the extraction of groundwater, helping maintain its levels and preventing land subsidence.
-
Water Quality: Rainwater is naturally soft, and when properly filtered, can be of superior quality to some municipal water sources.
An Ecological Boost
Additionally, rainwater harvesting can prevent soil erosion and flooding by reducing the run-off from buildings and paved areas.
Overview of a DIY rainwater collection system
A basic rainwater collection system comprises a catchment area (like a roof), gutters and downspouts, a filtering mechanism, and storage tanks. The water collected can be used for landscaping, irrigation, toilet flushing, and even drinking if appropriately purified.
Key Components
-
Catchment Surface: This is where rainwater is initially collected, usually rooftops.
-
Conveyance System: Gutters and downspouts that direct water to the storage facility.
-
First Flush Diverter: A mechanism to discard the initial rainwater, which may contain contaminants from the roof.
-
Storage: Tanks or barrels to store the harvested water.
-
Filters: Removes debris and contaminants before the water enters the storage tanks.
Step-by-step guide to creating a system at home
-
Evaluate Your Roof: Ensure your roofing material is suitable for rainwater harvesting. Metal roofs are ideal, while some treated roof materials might contaminate the water.
-
Install Gutters and Downspouts: If not already present, fit your roof with gutters to collect rainwater and downspouts to channel the water towards storage.
-
Set Up First Flush Diverter: This helps in discarding the initial dirty rainwater. It’s a separate pipe that fills up before the storage tank, ensuring only cleaner water makes its way into storage.
-
Choose Storage: Select storage tanks or barrels based on your needs. Ensure they’re dark (to prevent algae growth) and have a tight-fitting lid (to keep out debris and mosquitoes).
-
Install Filters: Position mesh screens at the top of downspouts to prevent leaves and larger debris from entering the storage. If using water for indoor purposes, consider adding additional filtration systems.
-
Maintenance: Regularly clean gutters, check for leaks, and ensure filters are unclogged. Periodically, empty and clean the storage tanks.
Optional Enhancements
Consider adding a pump for increased water pressure or a more sophisticated filtration system if you plan on using the water for more diverse household tasks.
In conclusion, a DIY rainwater harvesting system is a testament to how simple measures can lead to significant sustainable outcomes. With the pressing need to conserve water, such a system is an invaluable addition to any home, marrying ecological benefits with practical utility.
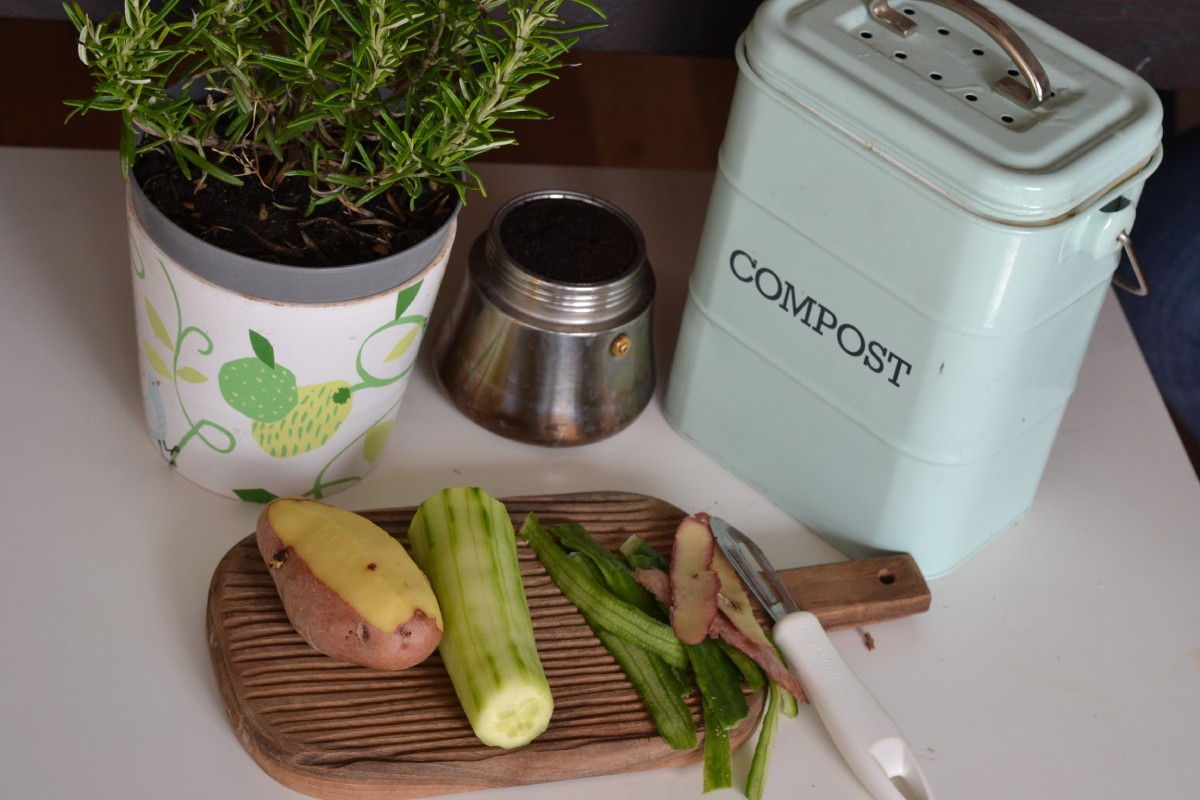
Composting at Home
Composting is a sustainable process that transforms your kitchen scraps and yard waste into nutrient-rich soil, perfect for gardening. By embracing composting, you can reduce landfill waste, lower your carbon footprint, and give back to the earth in a genuinely organic way. This section delves into the myriad benefits of composting, offers a brief overview of DIY compost bins, and provides clear-cut instructions for starting your composting journey.
Benefits of composting
Composting is more than just an eco-friendly trend; it’s a practice steeped in tangible benefits:
-
Waste Reduction: Roughly 30% of household waste is organic and can be composted. This means less trash heading to landfills and incinerators.
-
Enriched Soil: Compost invigorates soil with essential nutrients, improving its quality and texture, which in turn leads to healthier plants.
-
Carbon Sequestration: Composting captures and stores carbon, helping in the fight against climate change.
-
Natural Fertilizer: Using compost reduces the need for chemical fertilizers, promoting a more organic approach to gardening.
Cost Savings
Moreover, creating your compost means you no longer need to purchase soil enhancers or fertilizers, saving money in the long run.
Overview of DIY compost bins
While there are various compost bins available in the market, creating one at home can be both cost-effective and gratifying.
Types of Bins
-
Stationary Bin: Typically a wooden or wire frame box, this bin is ideal for larger gardens and yards.
-
Tumbling Composter: A rotating bin that speeds up decomposition by mixing the contents as it turns.
-
Worm Composting Bin: A system that utilizes red worms to break down organic material, producing worm castings—a high-quality compost.
-
Bokashi Bins: An anaerobic fermentation method that pre-digests organic waste, making it easier to compost.
Instructions for composting at home
-
Select a Suitable Spot: Choose a dry, shady spot near a water source for your compost pile or bin.
-
Layer Your Compost: Start with coarse, dry materials like twigs at the base. Then alternate between green materials (e.g., vegetable scraps, coffee grounds) and brown materials (e.g., dry leaves, cardboard).
-
Maintain the Right Balance: Aim for a balance between green and brown materials. A good rule of thumb is 3 parts brown to 1 part green.
-
Aerate Regularly: Turn the compost once a week to introduce air, which aids in decomposition and prevents odors.
-
Keep it Moist: Sprinkle water occasionally to keep the compost damp but not soggy.
-
Monitor Temperature: Heat is a sign that the compost is actively decomposing. If it cools, it might need more green material or moisture.
-
Harvest Your Compost: In 2 to 6 months, the bottom of your pile will turn into a dark, crumbly, and earthy-smelling material. This is your compost, ready to enrich your garden!
Tips for Success
-
Chop larger waste into smaller pieces to expedite decomposition.
-
Avoid composting meat, dairy, or diseased plants as they can attract pests or spread diseases.
In sum, composting at home is an enriching endeavor, both for the environment and for your garden. It’s an act that reflects a commitment to sustainability and a deep respect for the natural world. So, the next time you consider tossing those kitchen scraps, think of the fertile potential they hold and turn them into black gold for your garden!
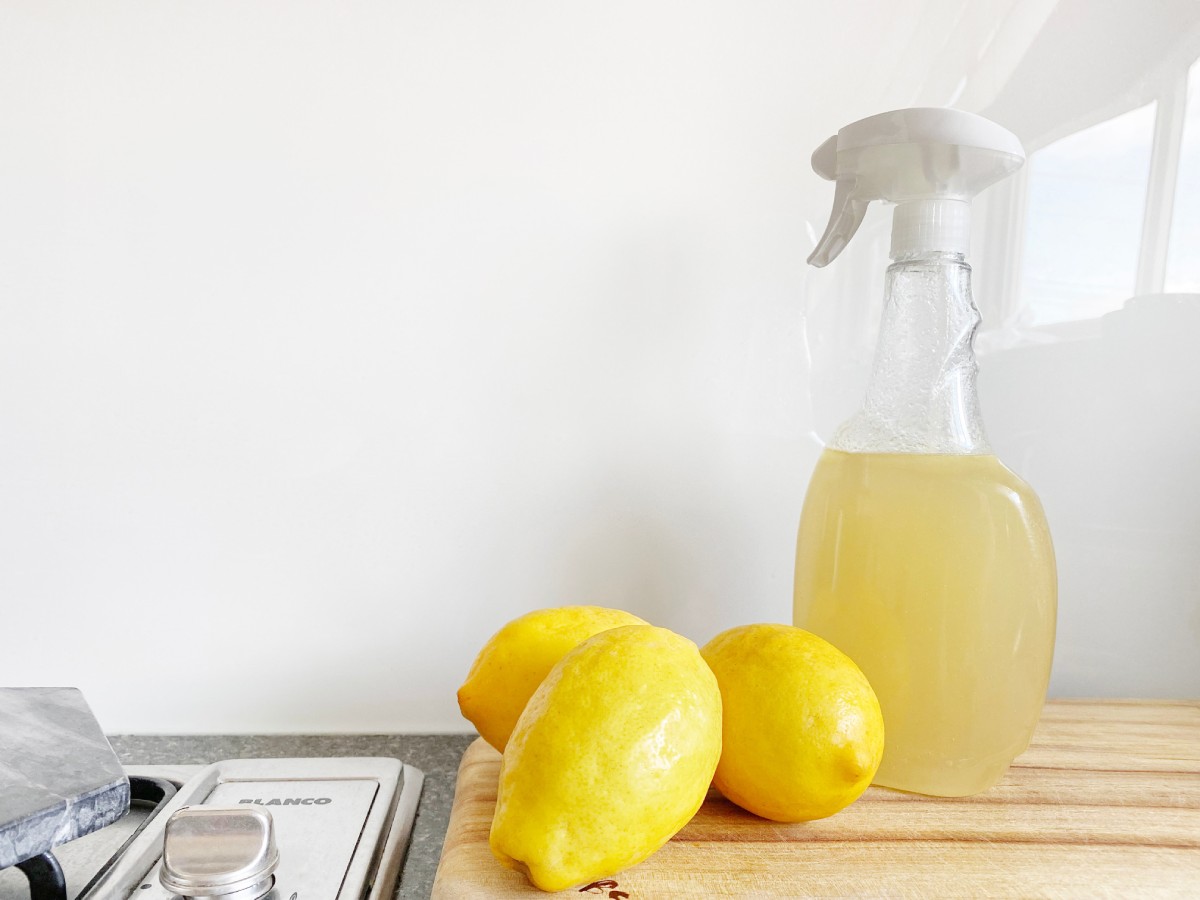
DIY Green Cleaning Products
The shift towards sustainability isn’t limited to just energy or waste reduction. One of the significant aspects often overlooked is the cleaning products we use daily. These products might be making our homes look sparkling clean but at what cost? Many store-bought cleaners contain chemicals that can be detrimental to our health and the environment. But fear not, the solution lies right in our pantry. With a few simple ingredients, we can whip up effective and eco-friendly cleaning products in no time. This section will shed light on the harmful chemicals often found in store-bought cleaners, introduce you to DIY green cleaning alternatives, and provide easy-to-follow recipes to kickstart your green cleaning journey.
Explanation of harmful chemicals in store-bought cleaners
Store-bought cleaners often come with flashy labels and promises of unbeatable cleaning power. However, lurking behind these promises are chemicals that are far from friendly.
-
Phthalates: Often found in fragranced household products, phthalates can be inhaled or absorbed by the skin. They are endocrine disruptors and can lead to hormonal imbalances.
-
Triclosan: Commonly found in dishwashing detergents and hand soaps labeled as “antibacterial”, triclosan can promote the development of antibiotic-resistant bacteria.
-
Ammonia: Used in polishing agents and glass cleaners, ammonia can irritate the eyes, skin, throat, and lungs, especially when mixed with bleach.
-
Chlorine: Present in scouring powders and toilet bowl cleaners, chlorine is a respiratory irritant and can disrupt thyroid functions.
The Hidden Dangers
Not only are these chemicals harmful to our health, but they also pose threats to aquatic life when they wash down the drain and enter waterways.
Overview of DIY green cleaning products
Green cleaning products, made from natural ingredients, offer a safer alternative to commercial cleaners. Not only are they biodegradable, but they’re also non-toxic, reducing harm to both our bodies and the environment.
Benefits of Going Green
-
Cost-effective: Making cleaners at home can be much cheaper than buying commercial products.
-
Safe for kids and pets: With no harmful chemicals, DIY cleaners are safer around young children and animals.
-
Customizable: You can adjust ingredients and scents according to your preferences.
Simple recipes for creating cleaning products at home
-
All-purpose Cleaner: Mix equal parts of white vinegar and water in a spray bottle. Add a few drops of essential oil (like lavender or lemon) for a pleasant scent.
-
Glass Cleaner: Mix 1/4 cup of white vinegar, 1/4 cup of rubbing alcohol, 1 tablespoon of cornstarch, and 2 cups of warm water. Shake well and use with a soft cloth or newspaper.
-
Bathroom Scrub: Make a paste with baking soda and a small amount of water. Add a few drops of tea tree oil for its antimicrobial properties. Apply, scrub, and rinse.
Pro Tips:
-
Always test your homemade cleaner on a small, inconspicuous area first to ensure it doesn’t cause discoloration or damage.
-
Citrus peels soaked in white vinegar for a couple of weeks make a fragrant base for all-purpose cleaners.
Transitioning to DIY green cleaning products is a step towards a healthier home and a happier planet. It’s a testament to the power of nature and the fact that sometimes, the best solutions are the simplest ones. Embrace these natural alternatives and make your home a safe, chemical-free sanctuary.
Energy-Efficient Lighting
A bright, well-lit room can do wonders for our mood and productivity, but the type of lighting we choose impacts more than just ambiance. Energy-efficient lighting is rapidly becoming an integral part of sustainable living. By making a switch, we can significantly reduce energy consumption, lower electricity bills, and diminish our carbon footprint. But how do we transition to this kind of lighting, and can we do more to optimize natural light in our homes? This section illuminates the importance of energy-efficient lighting, provides a comprehensive guide on choosing the right bulbs, and shares innovative DIY projects to make the most of the sun’s natural glow.

Importance of energy-efficient lighting
The decision to adopt energy-efficient lighting is a bright one, indeed!
-
Economic Savings: Energy-efficient bulbs, such as LEDs, consume substantially less energy than traditional incandescent bulbs. This reduced energy consumption translates to notable savings on electricity bills over time.
-
Environmental Benefits: With lesser energy requirements, these bulbs help in reducing greenhouse gas emissions, playing a vital role in our efforts to combat climate change.
-
Longevity: Energy-efficient light bulbs last considerably longer than their traditional counterparts, meaning fewer replacements and reduced waste.
A Sustainable Shift
Making the switch is more than an eco-friendly gesture; it’s a sustainable commitment that reflects in both our wallets and our planet’s well-being.
Guide to selecting and installing energy-efficient light bulbs
When we talk about energy-efficient lighting, LEDs (Light Emitting Diodes) often steal the spotlight.
-
Understanding Brightness: Rather than watts, which measure energy use, focus on lumens to gauge brightness. More lumens mean a brighter light; fewer lumens mean a dimmer light.
-
Choosing the Right Color: LEDs come in a range of colors. From the warm, yellowish light to the cooler, bluish tones - pick what suits your space best.
-
Compatibility: Ensure the bulb fits your fixture. Some LED bulbs are not compatible with dimmer switches, so double-check before making a purchase.
-
Installation: Simply screw the LED bulb into the socket, just as you would with an incandescent bulb. Some advanced models might come with unique instructions, so always refer to the manufacturer’s guidelines.
Invest in Quality
Opt for reputable brands and look for certifications. Quality LEDs might be slightly pricier but offer better performance and longevity.
DIY projects to optimize natural light
Harnessing natural light not only reduces the need for artificial lighting but also adds a refreshing touch to interiors.
-
Reflective Paint: Opt for light-colored, reflective paints. These shades can bounce back sunlight, making rooms appear brighter without extra lights.
-
Mirrors: Strategically placing mirrors can effectively reflect and distribute sunlight throughout the room.
-
Open Shelving: Instead of bulky cabinets, use open shelves. They allow light to flow freely, making spaces feel more open and well-lit.
Think Outside the Box
Creativity plays a significant role here. From light-colored furnishings to sheer curtains, small changes can dramatically increase natural light in your home.
Energy-efficient lighting is more than just a trend; it’s a responsibility. As we strive for a more sustainable lifestyle, these lighting choices can make a profound difference. Whether it’s the bulbs we choose or our efforts to bask in more natural light, each step brings us closer to a brighter, eco-friendlier future.
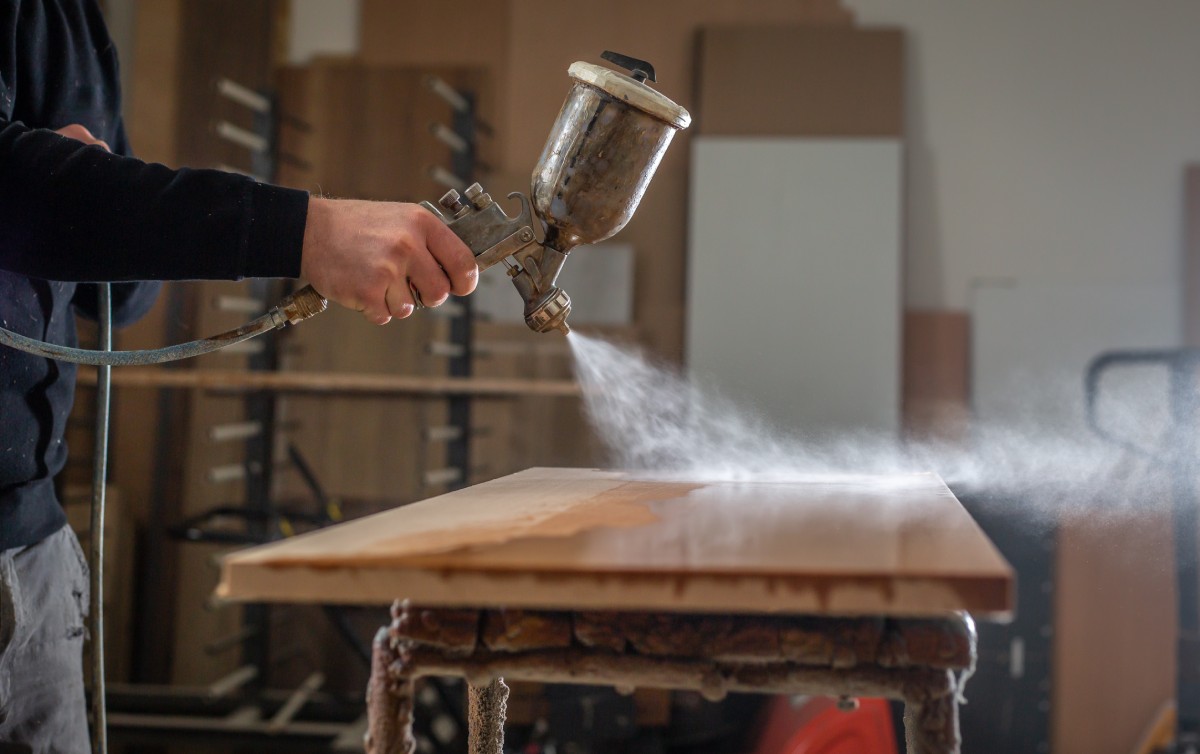
Upcycling Furniture
Before you think of discarding that old chair or table, consider giving it a new lease of life. Upcycling, the art of creatively repurposing and rejuvenating worn-out or outdated items, is making waves in the sustainable living community. With a touch of creativity, items destined for the landfill can transform into beautiful and functional pieces that tell a story. In this section, we’ll delve into the benefits of upcycling, explore some imaginative projects for old furniture, and guide you through the steps to rejuvenate an unloved item.
Benefits of upcycling
-
Environmental Impact: Upcycling significantly reduces waste, keeping items out of landfills. Every piece of furniture upcycled translates to one less item being produced, minimizing carbon footprints and conserving resources.
-
Cost-Efficient: Rather than splurging on new furniture, upcycling makes use of what you already have. With a bit of effort and minimal investment, you get ‘new’ pieces at a fraction of the price.
-
Unique & Personalized: Upcycled furniture carries character. Each creation is a unique piece that showcases personal style and creativity.
A New Perspective on Old Items
Viewing old furniture as a canvas for creativity can lead to unexpected and delightful results. The process of transforming something old into something new is both fulfilling and eco-friendly.
Overview of upcycling projects for old furniture
-
Distressed Wood Coffee Table: Turn an old wooden table into a chic distressed coffee table with some paint and a bit of sanding.
-
Reupholstered Chairs: Breathe new life into tired chairs by reupholstering them with vibrant fabrics.
-
Bookshelf from Old Drawers: Don’t toss out those old dresser drawers! They can be painted, stacked, and anchored to create a quirky bookshelf.
-
Pallet Bed Frame: Wooden shipping pallets can be refurbished into sturdy and stylish bed frames.
Limitless Possibilities
The potential projects are endless. With a bit of inspiration and a dash of creativity, nearly any old furniture item can find a new purpose.
Steps for completing a basic upcycling project
-
Assessment: Before diving in, examine the furniture. Check for structural issues, assess what needs fixing, and decide on a new look or purpose for the piece.
-
Gather Materials: Depending on the project, this could include paint, fabric, sandpaper, nails, or even new knobs and handles.
-
Preparation: Clean the item thoroughly and make any necessary repairs. Sand down wooden items to ensure a smooth painting surface.
-
Transformation: This is where the magic happens. Paint, upholster, or modify the piece according to your vision.
-
Seal and Protect: Once your transformations are complete, consider sealing wooden items with a clear protective coat to ensure longevity.
-
Admire Your Work: Place the finished piece in its new spot in your home and enjoy the satisfaction of a job well done.
Embrace Imperfections
Remember, upcycling is as much about character as it is about perfection. Little imperfections and quirks often add to the charm of the finished piece.
Upcycling furniture is more than just a DIY project—it’s a statement of sustainability. It’s about seeing the potential in the old and transforming it with vision and creativity. In a world where disposability often seems the norm, upcycling stands as a testament to the beauty of renewal and the endless possibilities that come with a bit of imagination.
DIY Insulation
Keeping our homes warm in the winter and cool in the summer is an ongoing challenge, and often a costly one. Proper insulation is the key to achieving this without escalating energy bills. With the surge of interest in sustainable living, DIY insulation projects are gaining popularity. By understanding and enhancing your home’s insulation, you can live more sustainably and economically. In this section, we’ll explore the vital role insulation plays, guide you through some DIY insulation projects, and share tips to cut down on energy waste in your household.
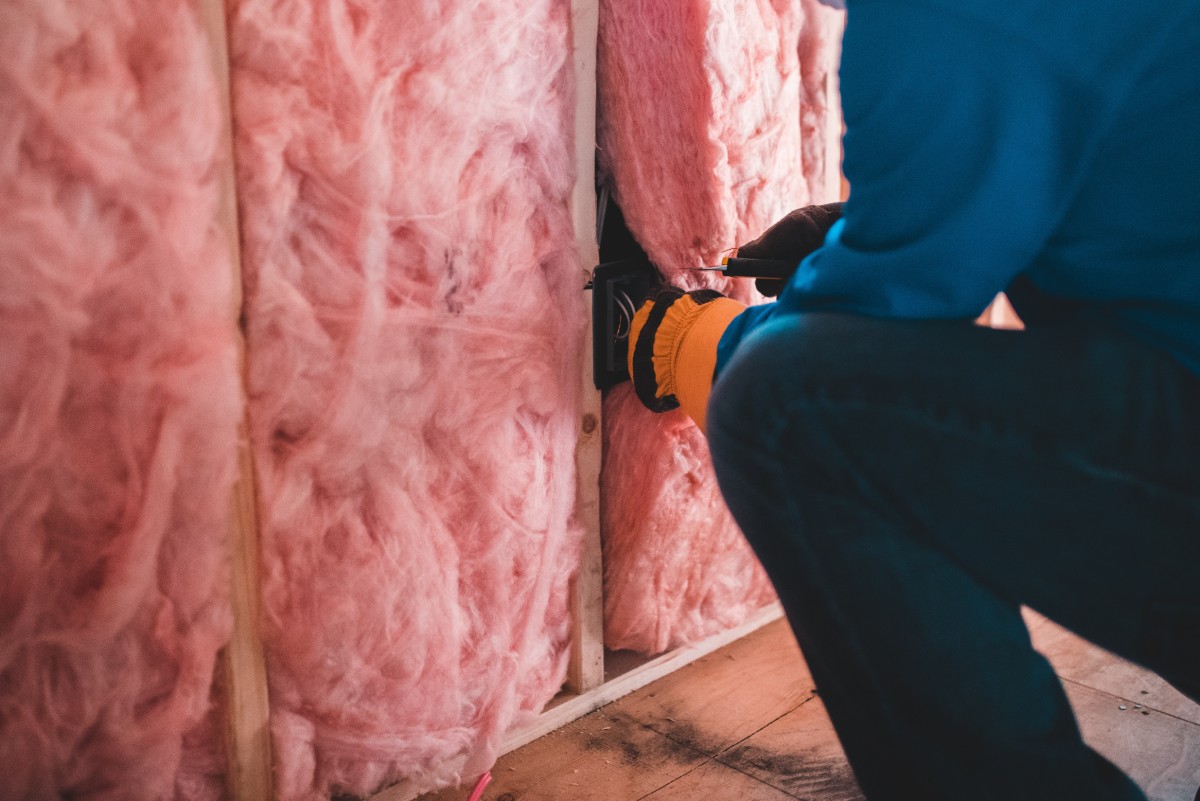
Explanation of the importance of proper insulation
-
Energy Conservation: Proper insulation ensures that the energy you use to heat or cool your home isn’t wasted. This means reduced energy consumption, leading to lower energy bills.
-
Environmental Impact: With less energy needed, there’s a reduction in the greenhouse gas emissions associated with energy production. This directly contributes to combating climate change.
-
Comfort: A well-insulated home maintains its temperature, providing consistent comfort throughout.
The Science Behind It
Heat always moves from warmer to cooler areas. In winter, it flows out of your home, and in summer, it flows in. Insulation acts as a barrier, reducing this heat flow.
Guide to DIY insulation projects
-
Window Insulation Film: A clear film that you can apply to your windows. It adds an extra layer of insulation, trapping air between the window and the film, which acts as a buffer against temperature changes.
-
Draft Excluders: These can be easily made from old fabrics or clothing and placed at the bottom of doors or windows to prevent drafts.
-
Attic Insulation: Using rolls of mineral wool or recycled materials, you can insulate your attic space, preventing heat from escaping through the roof.
-
Wall Insulation: If you’re handy, you can open up walls and fill them with eco-friendly insulating materials like sheep’s wool or recycled denim.
Safety First
Always wear protective gear like gloves and masks when working with insulation, especially fibrous materials.
Tips for improving insulation and reducing energy waste at home
-
Thermal Curtains: Invest in or make your own thermal curtains. These have a special insulating layer that prevents heat transfer through windows.
-
Seal Gaps: Over time, houses can develop cracks and gaps. Use caulk or weatherstripping to seal any leaks around windows and doors.
-
Insulate Outlets and Switches: Often overlooked, these can be sources of drafts. You can purchase special foam gaskets to place behind them.
-
Landscaping: Strategically planted trees or shrubs can act as windbreakers and provide shade, reducing the energy required to heat or cool your home.
Old Homes, New Tricks
Even if you live in an older home, there are always ways to enhance its insulation. Sometimes, the simplest solutions, like draft excluders or thermal curtains, can make a significant difference.
DIY insulation is more than just a weekend project; it’s an investment in your home’s future and our planet’s well-being. When you take the reins and ensure your home is efficiently insulated, you’re actively reducing energy waste, combating climate change, and creating a more sustainable living space. Embrace these DIY insulation projects and tips to make a meaningful difference in both your energy bills and carbon footprint.
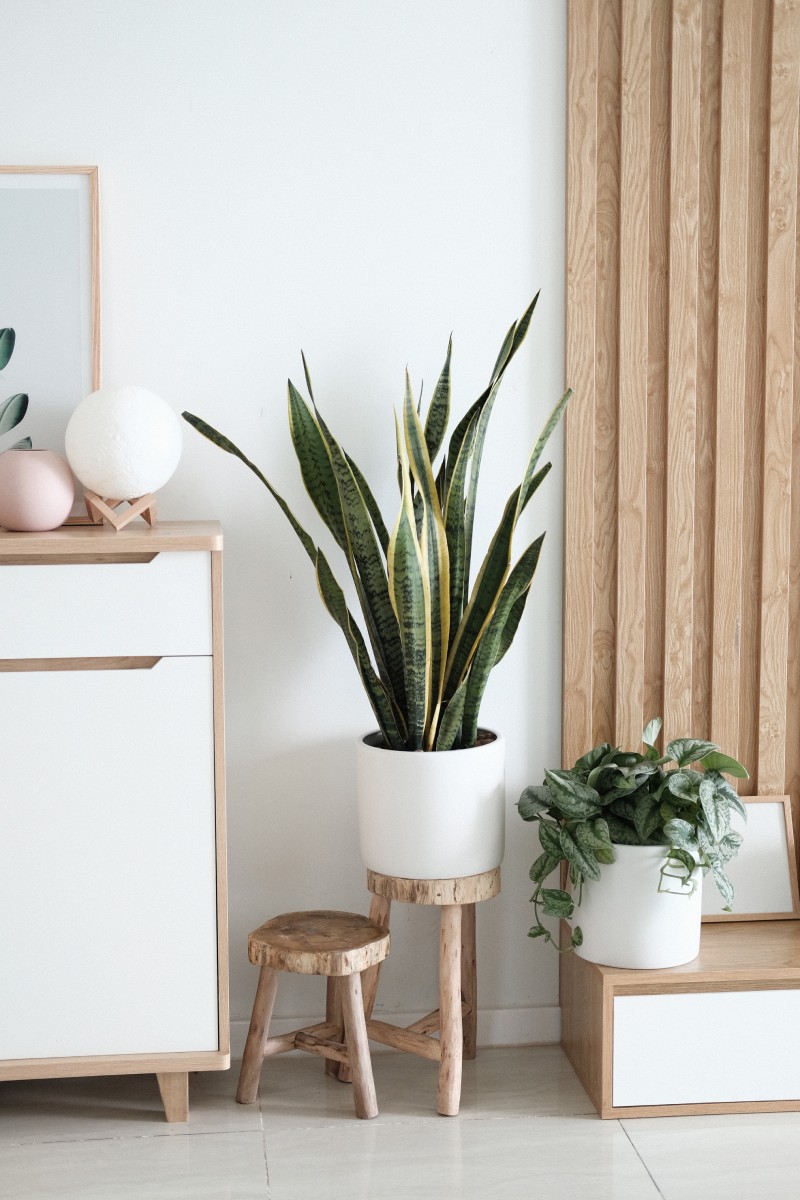
Building a Home Garden
Cultivating a garden at home is more than just an aesthetic appeal or a pastime. It’s a gateway to sustainable living. By growing your food or nurturing native plants, you not only cut down on your carbon footprint but also create a healthier living environment. Home gardens can be an antidote to modern life’s fast pace, offering relaxation and an opportunity to connect with nature. Dive into the world of home gardening and discover its myriad benefits, learn the steps to establish one, and explore some low-maintenance plants that promise bountiful yields.

Benefits of home gardening
-
Environmental Contribution: Gardens act as a carbon sink, absorbing CO2, and releasing oxygen. They also support biodiversity, providing a haven for pollinators like bees and butterflies.
-
Physical and Mental Health: Gardening is a therapeutic activity. It’s a form of exercise, and the connection with nature can help reduce stress and enhance mental well-being.
-
Economic Savings: Growing your produce can significantly cut down grocery bills, especially if you cultivate high-yield, staple vegetables and herbs.
-
Fresh and Organic: Home-grown produce is fresh, free from harmful pesticides, and packed with nutrients.
A Learning Journey
Home gardening can also be an educational experience for children, teaching them about nature, responsibility, and the food they eat.
Steps to create a sustainable garden at home
-
Choose the Right Location: Find a spot that receives adequate sunlight—most vegetables and fruits require at least 6 hours of direct sunlight.
-
Prepare the Soil: Good soil is the foundation of a thriving garden. Enrich it with compost or organic matter to ensure it’s fertile and has good drainage.
-
Plan Your Beds: Raised beds are often recommended as they ensure good drainage, make it easier to manage soil quality, and deter some pests.
-
Pick Your Plants: Choose a mix of seasonal vegetables, fruits, and flowers. This promotes biodiversity and ensures a year-round harvest.
-
Water Wisely: Use drip irrigation or soaker hoses to reduce water wastage. Watering in the early morning or late evening minimizes evaporation.
-
Natural Pest Control: Opt for organic pest solutions like neem oil or introduce beneficial insects like ladybugs.
Embrace Companion Planting
Planting certain plants together can help deter pests, improve growth, and enhance flavor. For instance, planting basil with tomatoes can repel mosquitoes and flies.
Suggestions for low-maintenance, high-yield plants
-
Lettuce and Leafy Greens: These grow quickly, and you can start harvesting in a few weeks.
-
Tomatoes: They’re versatile and can be used in various dishes. Opt for cherry tomatoes for higher yields.
-
Cucumbers: If trained vertically, cucumbers can produce abundantly in a small space.
-
Herbs: Basil, mint, and rosemary are easy to grow and can be used in numerous culinary dishes.
-
Beans and Legumes: They’re not just high-yield but also enrich the soil by fixing nitrogen.
Regional Varieties
Always consider local and regional plant varieties, as they’re adapted to the area’s soil and climatic conditions, making them easier to grow and more resilient.
Building a garden at home is both a joy and a responsibility. As you nurture plants, you’re also taking steps towards a more sustainable lifestyle, ensuring fresh produce right at your doorstep and creating a little oasis for yourself and the environment. So, roll up your sleeves and let’s get planting!
Conclusion
As we stand at the precipice of ecological change, the steps we take in our everyday lives gain paramount importance. Incorporating sustainability into our homes goes beyond a trend—it’s a necessary shift that melds mindfulness with action. This journey through various sustainable DIY projects not only presented methods to greenify your living space but also echoed a larger sentiment: small changes accumulate to create monumental impacts. Before we wind up, let’s revisit the potential ramifications of these endeavors, underline the vast benefits of a sustainable lifestyle, and finally, ignite the spark to inspire more hands to craft a greener tomorrow.

Recap of the potential environmental impact of these projects
-
Carbon Footprint Reduction: By harnessing natural energy sources like sunlight or by optimizing energy usage through efficient lighting and insulation, we significantly cut down greenhouse gas emissions.
-
Resource Conservation: Rainwater harvesting and sustainable gardening ensure we use nature’s resources judiciously, thus helping in water conservation and reducing the strain on commercial farming.
-
Waste Minimization: Composting kitchen waste, upcycling furniture, and crafting DIY green cleaning products substantially decrease landfill contributions and reduce the proliferation of harmful chemicals in our environment.
A Ripple Effect
Remember, the ecological benefits of these projects extend beyond immediate results. For instance, growing a garden not only provides fresh produce but also aids in improving air quality, fostering biodiversity, and even creating microclimates.
Final thoughts on the benefits of sustainable living
Sustainable living is an expansive canvas, painted with myriad hues of benefits:
-
Healthier Lives: Organic home-grown produce, green cleaning agents, and a toxin-free environment ensure robust physical health and mental well-being.
-
Economic Savings: Many of these DIY projects, in the long run, lead to substantial cost savings, be it through reduced utility bills, decreased reliance on store-bought items, or minimized waste management expenses.
-
Ethical Contentment: There’s an unparalleled joy in knowing that your actions tread lightly on the Earth, fostering a harmonious existence with nature.
Building Community
Additionally, sustainable living often sows the seeds of community building. Sharing produce, exchanging DIY tips, or collaborating on neighborhood sustainability projects fosters bonds and strengthens community ties.
Encouragement for readers to start their own sustainable DIY projects
Starting your sustainable DIY journey might feel daunting, but remember, every big change begins with a single step. Your initial endeavors might be as simple as replacing a light bulb or planting a herb, but its ripple effects are profound.
Overcoming Hesitation
It’s natural to feel apprehensive or overwhelmed. But often, the most challenging part is starting. Once you immerse yourself, the rewards—tangible and intangible—will fuel your journey.
So, arm yourself with the knowledge you’ve gathered, tap into the reservoir of inspiration, and initiate that project you’ve been contemplating. Whether it’s the joy of biting into a tomato you grew, the comfort of lounging in an upcycled chair, or the satisfaction of watching rainwater collect in barrels—you are poised to make a difference. And as you embark on this fulfilling voyage, know that with each sustainable stride, you’re crafting a legacy for future generations, molding a world where humanity and nature thrive in unison. Let’s begin!

